
Schaeffler
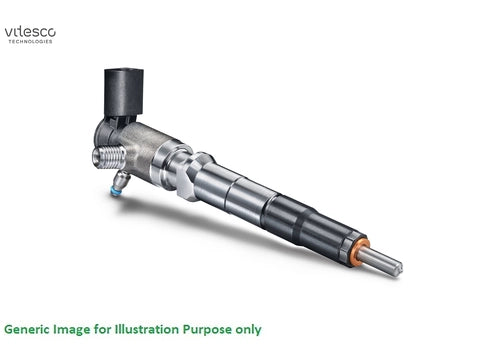
Schaeffler / Vitesco Ford Ranger / Transit / Everest 3.2L 2.2L / Mazda BT50 3.2L / Land Rover Defender 2.2L INJECTOR
Schaeffler / Vitesco Ford Ranger / Transit / Everest 3.2L 2.2L / Mazda BT50 3.2L / Land Rover Defender 2.2L INJECTOR
SKU: 562002210/A2C59517051
Couldn't load pickup availability
APPLICATION LIST
FORD
-
Ford Ranger PX (2011–2022) – 2.2L & some 3.2L family
-
Ford Transit (2011–2018+) – 2.2 TDCi
-
Ford Transit Custom (2012–2018) – 2.2 TDCi
-
Ford Everest (PX) – 2.2L
MAZDA
-
Mazda BT-50 (2011–2020) – 2.2L & 3.2L (Ford platform)
LAND ROVER
-
Defender 2.2L (Puma / ZSD-422 engine)
-
Cross ref: LR032067
(Citroën / Peugeot)
-
Citroën Jumper / Relay – 2.0 / 2.2 HDi
-
Peugeot Boxer – 2.0 / 2.2 HDi
PART NUMBER CROSS REFERENCE
OEM Numbers:
-
BK2Q-9K546-AE / AF / AG
-
BK2Z-9E527-A
-
1717686 / 1728574 / 1746967
-
1840747 / 2079601
-
LR032067
-
16 238 396 80
-
98 011 254 80
CONTINENTAL P/N:
A2C59517051
Piezo common rail (PCR) injectors
Instructions for handling and commissioning
Piezo common rail injectors are nowadays used mainly in
modern diesel engines. The injector needle in the injector is
no longer controlled by an electromagnet, but by a high-
precision piezo actuator. This consists of over wafer-
thin ceramic plates, layered on top of each other. The piezo
actuator expands as soon as a switching voltage is applied,
whereby the injection holes of the nozzle are opened within
milliseconds. Thanks to these extremely short response
times, the fuel can be injected precisely and consistently
up to seven times per combustion cycle. This contributes
significantly to combustion efficiency.
Piezo common rail diesel injectors may malfunction after
high mileage due to wear. This can be manifested by various
symptoms:
• Loss of power
• Engine running rough
• Difficulties starting
• Increased exhaust emissions
• Soot or white smoke
• Knocking noises from the engine
• Increased fuel consumption
• Check engine lamp lights up
If an injector is suspected to be defective, a test should be
carried out using the diagnostic tool. A return flow rate
measurement can also be carried out. The injector must
only be replaced if a fault is confirmed.
Removing the injector:
• Thoroughly clean the repair area
• Remove the return line (Caution: fuel can escape due to
residual pressure. Wear safety goggles and gloves!)
• Remove the rail line from the injector and seal the open
end immediately
• Use suitable special tools and/or release sprays to
remove the injector
• Check the injector shaft and clean if necessary.
• Remove the old combustion chamber seal (sealing
washer)
• If necessary, rework the seat of the combustion cham-
ber seal in the cylinder head using a suitable tool
Fitting the new injector:
• Note the encoding of the new injector
• Do not remove the protective caps on the injector until
immediately before installation to prevent contaminati-
on and damage
• Replace the combustion chamber seal (if it is not part of
the new injector), note the stepped versions
• Insert the new injector
• Insert the clamping claw with a new screw and fasten
it to the tightening torque specified by the vehicle
manufacturer
• Replace the high-pressure line if the vehicle manufactu-
rer stipulates that this is necessary when replacing the
injector
• Install the high-pressure line without tension and fas-
ten it to the tightening torque specified by the vehicle
manufacturer
• Enter the previously noted encoding for the new injec-
tor in the engine control unit using a suitable diag-
nostic tool
• Replacing the connection adapters of the return line
and their safety clips is recommended
• With the engine running, inspect the rail and return
lines for leaks